

I think a homemade jam makes any cake or scone taste incredible – I will often go that extra mile when making a cake for a friend or loved one. This is my own go-to recipe and one that I repeat often. It’s so simple but does inevitably include Very Hot Sugary Liquid so I’ve included lots of tips to make the process as easy as possible!
I often use frozen raspberries from the supermarket (especially off-season) and they work just as well as fresh – you don’t even need to defrost them first – Heather.
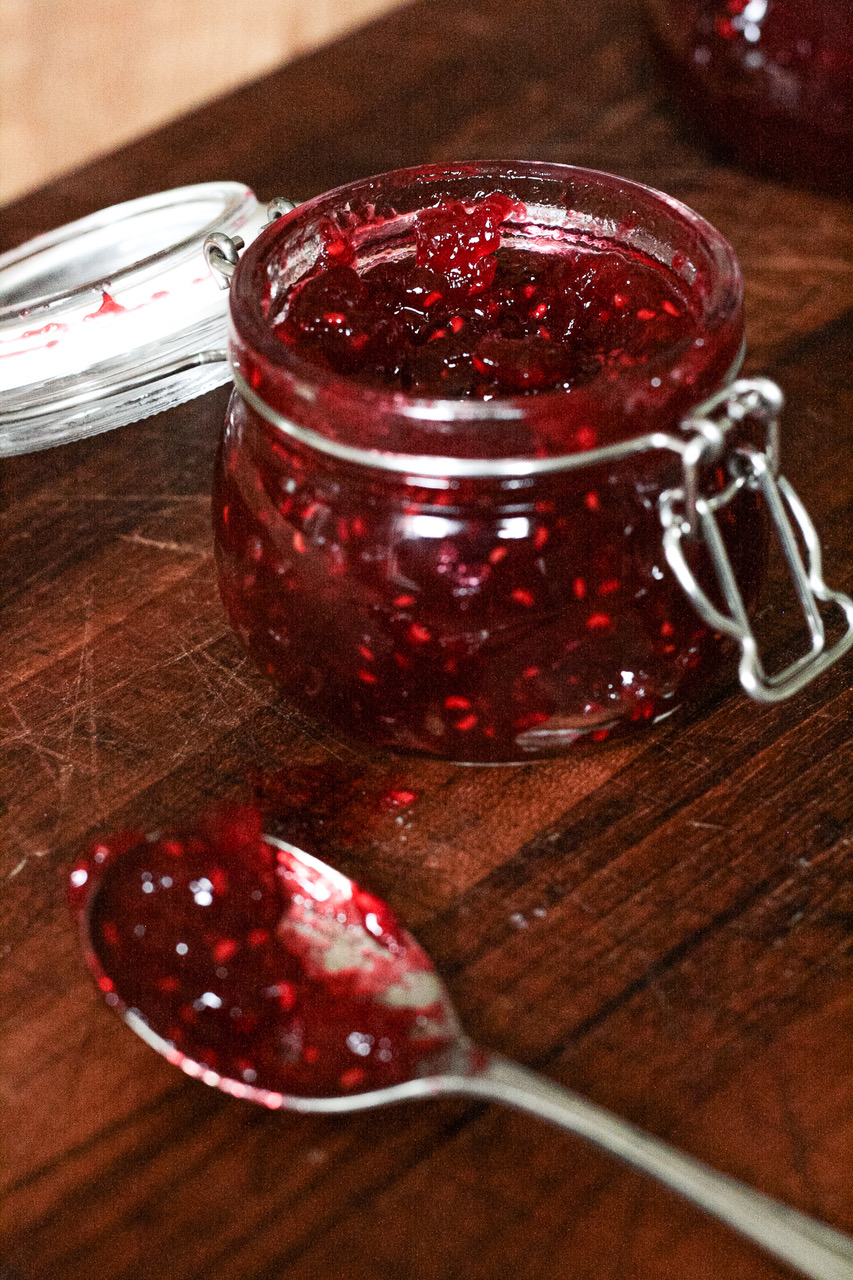
Ingredients
- 1kg raspberries
- 1kg jam sugar (this has pectin added already)
Equipment you’ll need:
- Large saucepan
- Large wooden spoon
- Oven gloves
- Small plate
- Sieve
- Medium sized bowl/jam jars
Notes before you start:
If you are giving this jam away or you expect to keep it for a while, then put your jars through a hot dishwasher to disinfect them before you start. My jam never stays around that long so I just use a big glass bowl!
This recipe requires you to stand at the stove for 15 to 20 minutes and stir constantly, so I would get everything ready before you start.
Also – boiling jam mixture is VERY hot, so please be careful!
Method
- Put your raspberries and sugar into the large saucepan and mix thoroughly. Turn the heat up to high and keep gently stirring as the raspberry mixture heats up. You’ll notice as the jam comes to boiling, that a foamy texture forms on the surface – this is normal.
- Keep gently stirring as the mixture starts rapidly boiling (this could take ten minutes if you are using frozen raspberries). Once the mixture begins rapidly boiling and bubbling, it may spit little bits of boiling hot jam from the saucepan – at this point I begin to use oven gloves to hold the spoon so that I don’t burn my hand!
- If you stop stirring, the bottom of the mixture is likely to burn … so just keep stirring!
- Once the mixture reaches rapid boiling, it will take about five minutes until the jam is done – as you are stirring, keep a close eye on the foamy texture on the top of the jam: you will notice this begin to disappear. Once the foam has gone and the bubbling sound becomes louder, dribble a little of the jam mixture onto the small plate and let it cool for 30 seconds. Then, using your finger or a spoon, move the jam on the plate and see if it is set. If it is still runny, keep boiling for one more minute. If it has set, take the jam off the heat.
- I tend to use jam for cakes so I like to sieve some of the seeds out. To do this, carefully tip half the mixture through the sieve into a bowl and, using the wooden spoon, push the jam through the sieve. Then stir the remaining “seeded” jam into the seed-free portion and mix together. Ignore this step if you want all the seeds in the jam!
- If you’re using jam jars, pour the warm jam into the jars (beware pouring very hot jam into cold glass jars) and seal.